About test generation
Overview
Test generation allows you to generate test plans from your use cases. You can also export the tests to an ALM target.
Blueprint generates a test for each path variation that can be taken in a use case. For example, if you have a simple use case with one alternate flow, there are two possible paths that can be taken. Therefore, Blueprint generates two tests for this use case. One of the tests would cover the main flow of the use case, and the second test would take the alternate flow.
Follow the example below to learn more about how test generation works in Blueprint.
Example
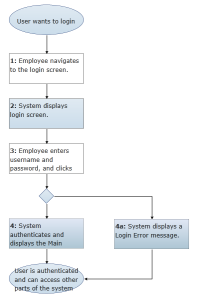
Here's the simple use case that we will use to generate a test plan:
A test plan was generated with the following options:
-
Selected use case only: there are no included use cases in the example, so this option is satisfactory.
- Generate only for 10 levels: the test plan will generate tests for level 10 and below (that is, all use case levels).
-
Break loop-backs: Yes
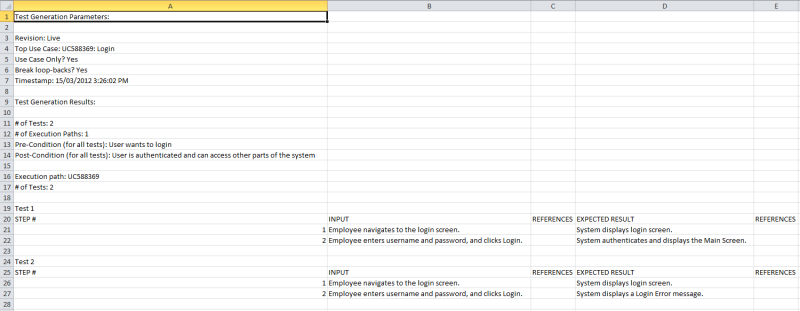
Here's the an example of the generated test plan in .csv format:
Because the example only contains one alternate flow, there are two path variations in this use case. Therefore, there are a total of two tests generated for this use case. There are a number of columns that provide you with data:
- INPUT: provides the actor steps
- EXPECTED RESULT: provides the system steps
- REFERENCES: provides information about any included use cases, external flows, attached UI Mockups, and so on.
Here is an example of the one of the tests after exporting to HP ALM:

Tasks
Generating a test plan
When you generate a test plan, you can view the generated tests in .csv format. You can also export the tests to an ALM system if your project administrator has configured an ALM target and granted you access to it.
To generate a test plan from one or more use cases:
-
 Click the Test Plans
  button on the ribbon (Import/Export tab, Export group).
-
 Click Next to generate the tests.
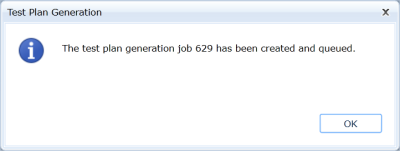
The Test Plan Generation wizard closes and a dialog is displayed, confirming that the project export job has been placed in the Job Management queue.
-
Click OK to close the dialog.
-
To continue, you will need to access the completed job.
The amount of time the queued job requires depends on how extensive use-case selections were, and how busy the job queue is.
You can access the job one of two ways:
-
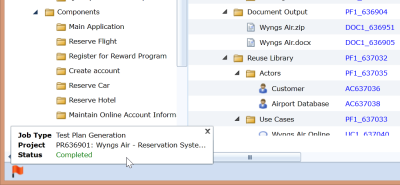
Notifications: When the job has completed, a notification icon (
 ) appears in the status bar, in the bottom leftmost part of the application window. (see "About notifications" for more information.)
Click the notification icon. If a Completed job status appears, click anywhere in the dialog.
-
The Job Management queue: Locate the job in the Job Management dialog (Menu button, Manage, Jobs). (see "About job management" for more information.)
Confirm its status is Completed. Click the job row, then click Show Result.
After accessing the completed job, the Test Plan Generation wizard is displayed, resuming at the Review Test Plans screen.
-
Notifications: When the job has completed, a notification icon (
-
 Click Download generated test(s) to save the tests as a .csv file.
-
If your project does not have any ALM targets, click Close.
If your project has ALM Targets, click Next to export the tests to an ALM system.
Project administrators manage your ALM Targets.
-
On the Select Target screen, select the ALM system that you want to export the tests to, and then click Finish.
Clicking the Cancel button closes the dialog without exporting the tests.


