Adding a new view
Saved views allow you to save your artifact list view settings so you can easily restore those settings at any time. For example, you may want one view that only displays basic artifact information, and another view that displays detailed information such as custom properties.
You can add as many views as you need. You can also share views so that other users can take advantage of the view you created.
To add a new view:
-
Set your artifact list options the way you want them. Read more about the artifact list settings that are saved and restored using views.
-
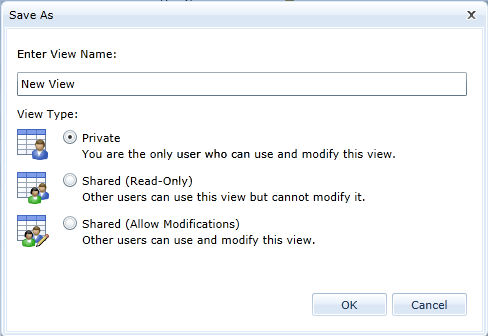
 Click the Save View As button on the ribbon (View tab, Artifact List).
 -
Specify a name for the new view.
- Click OK.
The view is automatically selected after you add the view. You can easily select a different view at any time.


