Adding traces from the relationships tab in the utility panel
Adding a trace establishes a relationship between two artifacts. Blueprint supports three different types of traces depending on the direction of the relationship. Read more about Trace Types.
To add a trace using the Relationships tab in the utility panel:
-
 Open the Relationships tab in the utility panel.
-
Click the Relationships  tab .
tab .
You can also point to the tab icon to view the name of the tab.
-
Click the Add Trace link.
The Traces dialog appears.
Note: To trace an artifact across projects, you need Trace privileges for both projects and Create and Edit privileges for either project. Contact your Blueprint project administrator for more information about project role privileges.
-
Select the artifact that you want to trace and establish a relationship.
Search or browse of the appropriate artifact on the left side of the dialog.
-
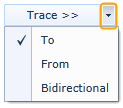
Select the type of trace to create.
Click the drop-down arrow located on the right side of the Trace button, and select To, From, or Bidirectional.
Read more about Trace Types.
-
Click the Trace button.
The new trace appears on the right side of the dialog.
-
Click OK.
The trace is saved and now appears in the traces table on the Relationships tab in the utility panel.
After the trace is saved, it appears on the Relationships tab in the utility panel. If you do not see the new trace, ensure that you have selected the Traces option in the Filter drop-down. Read more about Viewing and filtering relationships.
Learn More
Adding traces from the utility panel browse tab
Adding an inline trace
Traceability and relationships
