
If Tag Tutorial
Overview
An <if> tag allows you to display conditional information in your report.
Background
When you run a report, if the data retrieved meets a condition written into the template, the report will display information of your choosing.
When you create an <if> tag, you are setting the criteria for the condition and creating the information to be displayed if the data meets that criteria.
Tutorial
Step One: Create a table in which you will place an <if> tag.
Below is a table from the Northwind xml data explained in Data Sourcing.
|
EmployeeID |
LastName |
FirstName |
Title |
|
<Employees><EmployeeID> |
<LastName> |
<FirstName> |
<Title> |
:forEach>
Note: If you're working with an SQL database, you'll have slightly different language in the table.
The table starts with a <ForEach> tag, which earlier had been given the variable name EmployeeList (See Tag Builder). Remember, it is important to know the name (also referred to as the "var") of the <ForEach> tag, because you'll need this information to create your <if> tag.
This tag is followed by four <out> tags: <EmployeeID>, <LastName>, <FirstName>, and <Title>.
Finally, you see the <EndForEach> tag.
Step Two: Determine the condition
Suppose in the above example that we don't want to see the exact job title of each employee. Instead, all of the sales reps are being promoted, and we want a table that will tell us at a glance who is due a promotion. We want the output under Job Title to display the word "Promotion" if an employee is a sales rep.
|
EmployeeID |
LastName |
FirstName |
Title |
|
<Employees><EmployeeID> |
<LastName> |
<FirstName> |
|
:forEach>
notEmpty property
In the if tag you can set the notEmpty property to true or false. This property is only used for a SQL select that returns null or an XPath select that returns a zero length string. For the case of returning a node that exists but is empty:
- notEmpty = true - the if tag will return false because the node must not be empty to return true.
- notEmpty = false - the if tag will return true because the node exists and you are not requiring it be empty.
We delete the <out> tag under Job Title:
And now we're ready to create our <if> tag.
Step Three: Open the Tag Builder
Click the empty cell under Job Title and click the Tag Builder icon in AutoTag.
In the Tags tab, click the <if> tag icon:

Then, click the Select tab.
Step Four: Use the Wizard or the Select Bar
What you do next will depend upon your data source. If you're using an XML file, you will use the XPath Wizard. If you're using an SQL data source, you will be working directly with the Select Bar or with the SQL Wizard.
We'll walk through the XPath Wizard first, followed by what to do if you're connected to an SQL database.
The XPath Wizard
You may be interested in viewing the Using the XPath Wizard Tutorial Video
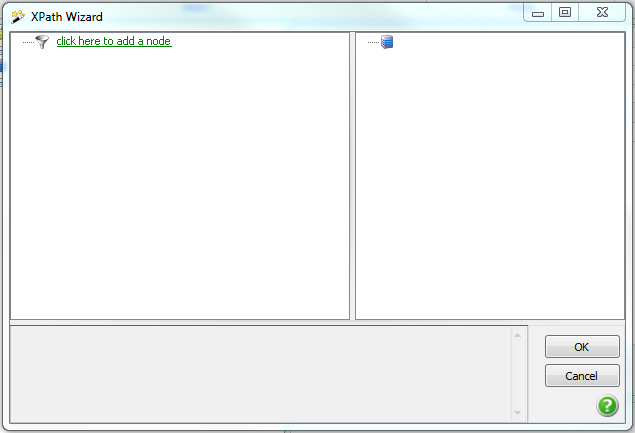
Click the Wizard:

This opens the Wizard dialog box.
A. In the left pane, click the statement [click here to add a node]:
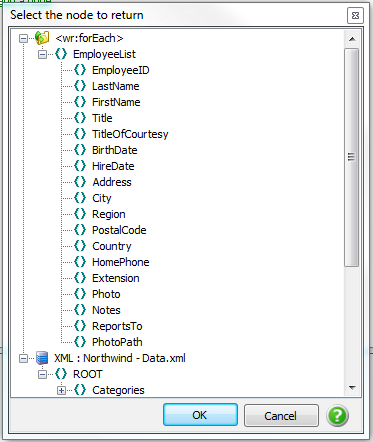
B. Now you must tell AutoTag where to look for the data. Because you're inside a <ForEach> loop, here you will choose the name of the <ForEach> variable. In this case, our var is named EmployeeList. In the dialog box that appears, click the node EmployeeList :
and click OK
C. The data of the first entry of the var appears in the right pane of the wizard, helping you confirm that you've chosen the correct node. Your next step is to set up the basis of the condition. In the left pane, click the statement [click here to add a group]:

And then, in the left pane, click the statement [click here to add a condition]:

D. Now you're ready to start adding information to the condition. The condition is made up of three parts: the node, the comparison, and the value.
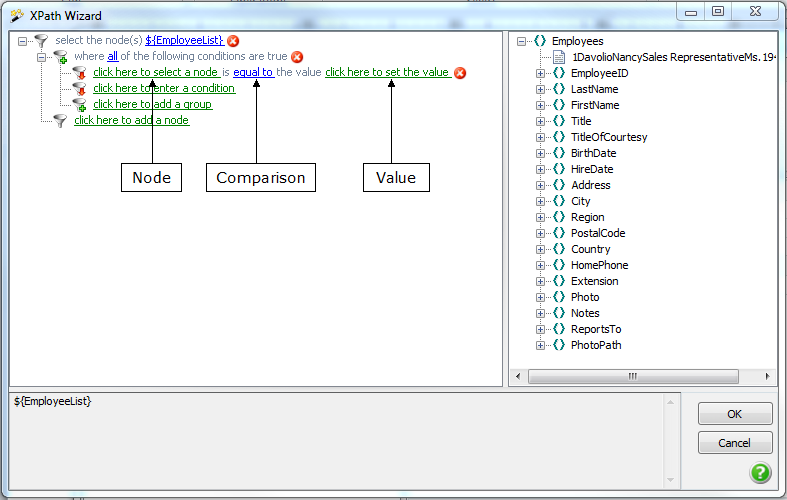
E. Click the first part, the statement [click here to select a node]. In the dialog box, click the node upon which you want to place the condition – in this case, the title node
F. Click the second part, the comparison. By default, the comparison is set to equal to. From the context menu, select the appropriate comparison – in this case, equal to:
and click OK
G. Click the third part, the value. Type the appropriate value in the drop-down menu – in this case, Sales Representative:
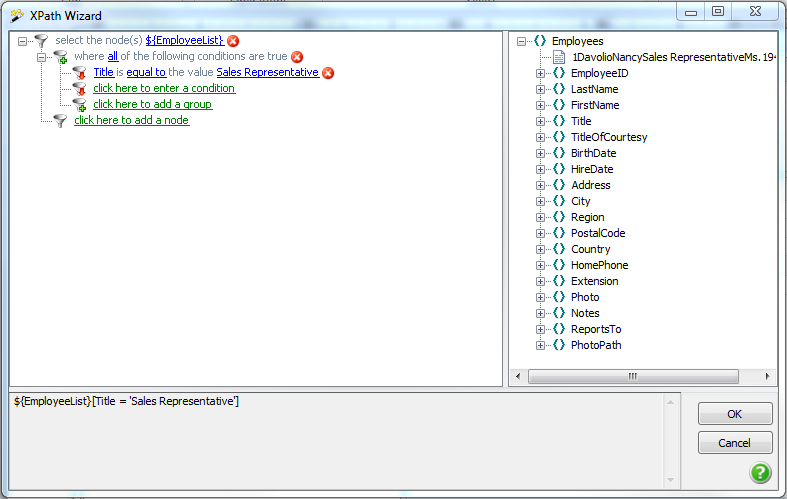
You can see the entire select statement (the query that will be sent to the data source when you run the report) in the lower pane of the wizard. Click OK. This closes the XPath Wizard.
Click Save Tag.
Step Five: Enter the text to be displayed
Now that the formatting of the <if> tag has been taken care of, you can enter the text you want displayed. Your table looks like this:
|
EmployeeID |
LastName |
FirstName |
Title |
|
<Employees><EmployeeID> |
<LastName> |
<FirstName> |
<Title = 'Sales Representative'> |
:forEach>
Click the last cell immediately after the closing angle bracket for the <if> tag and type the word "PROMOTION":
|
EmployeeID |
LastName |
FirstName |
Title |
|
<Employees><EmployeeID> |
<LastName> |
<FirstName> |
<Title = 'Sales Representative'>PROMOTION |
:forEach>
Step Six: Close the <if> tag
Click the last cell immediately after the word "PROMOTION." Open the Tag Builder, click the <EndIf> tag icon, and click OK. The table now looks like this:
|
EmployeeID |
LastName |
FirstName |
Title |
|
<Employees><EmployeeID> |
<LastName> |
<FirstName> |
<Title = 'Sales Representative'>PROMOTION:if> |
:forEach>
Step Seven: Run the report
Save your Blueprint using Word's Save command. Then, from the AutoTag Run Report group, click the desired report format icon. In this example, we chose to view the report as a PDF file, and this is the result:
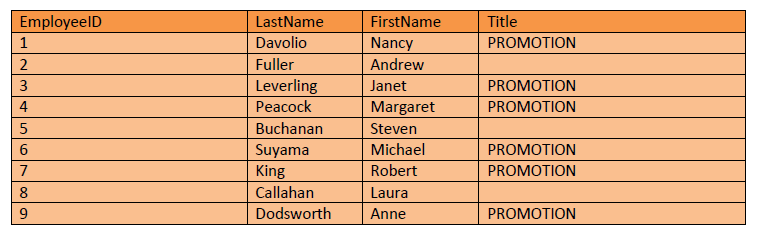
Great; you've successfully created an <if> tag. Now that you've mastered that, we'll introduce you the <if> tag's cousin, the Else Tag.